

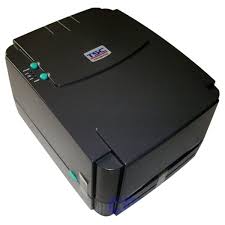

This guide covers a first-time driver installation for a thermal label printer connected over USB or Ethernet. The steps are the same for TSC, Godex and Citizen desktop and industrial models.
Before you start
- Unbox the printer, fit the label roll and ribbon (thermal transfer models only), and close the print mechanism until it latches.
- Connect power and switch the printer on. Wait for the status LED to settle to a steady ready state.
- Do not connect the USB cable until the installer asks you to.
Install the driver
- Download the driver for your model from the Drivers & Manuals section, or from the manufacturer’s support site.
- Right-click the downloaded installer and choose Run as administrator. Windows blocks driver installation for standard users.
- Accept the licence agreement and choose Install printer drivers.
- Select your connection type:
- USB — connect the cable when prompted. The installer detects the printer automatically.
- Ethernet / Wi-Fi — choose the printer from the discovered list, or enter its IP address manually.
- Confirm the model name shown matches the label on the printer, then finish the wizard.
Confirm it works
- Open Settings → Bluetooth & devices → Printers & scanners.
- Select your printer, open Printer properties, and click Print Test Page.
- A correctly configured printer feeds one label and prints the test pattern without skipping.
If the test page does not print
- Check the printer is not paused or set to “Use Printer Offline”.
- Confirm the label size in the driver matches the media actually loaded — a mismatch is the most common cause of blank or skipped labels.
- Run a media calibration so the printer learns the label length and gap. See Calibrating the label gap sensor.
- For network printers, confirm the printer and PC are on the same subnet and that the IP address has not changed.